LVM makes online storage changes much less disruptive than they used to be. This walkthrough covers a specific case: a CentOS 7 VM running on ESXi 6.5 needs more space on an existing data partition, and the VM cannot be shut down.
At a high level there are three phases:
- Add a virtual disk in ESXi and make CentOS recognize it.
- Partition and format the disk. On Linux, unlike Windows, creating a partition is not enough; the space must be mounted directly or added to LVM before it can be used.
- Manage the volume group: create a physical volume from the partition, then either mount it on its own or add it to an existing LVM volume group. From there you can extend a logical volume, create a new logical volume, or allocate the new space in another way.
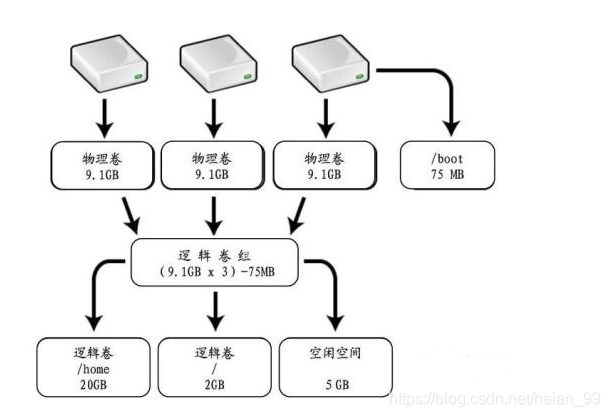
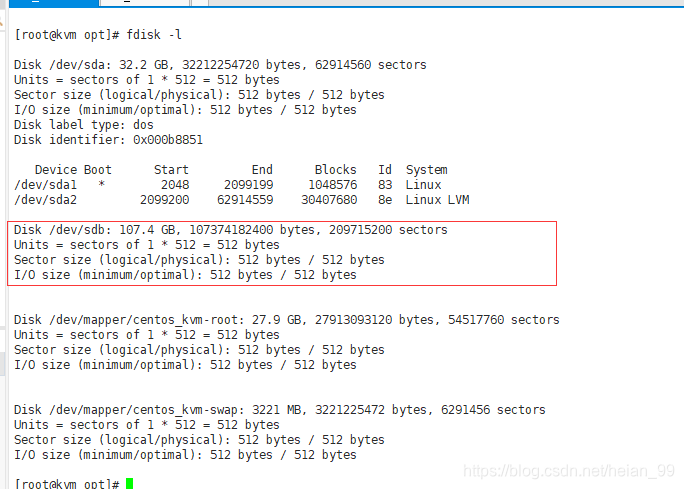
Before adding anything, check the current disk layout so you know what the system looks like and what will change.
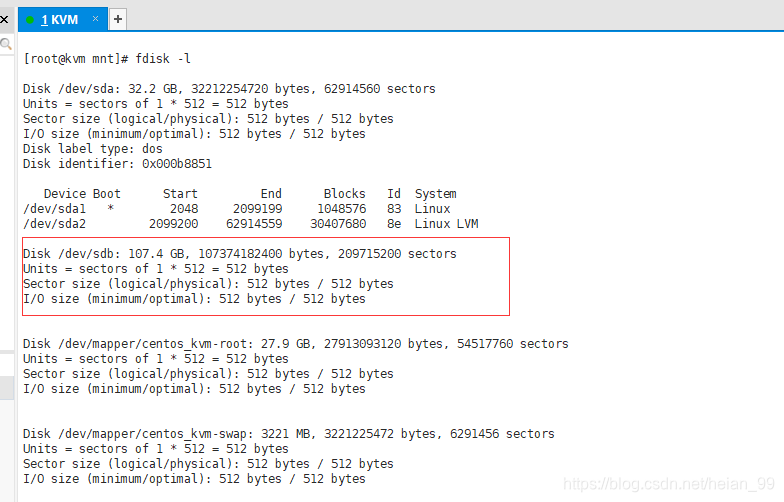
1. Make CentOS see the new disk
After adding the disk in ESXi, the guest does not necessarily see it immediately. A SCSI rescan is needed, roughly equivalent to scanning for new hardware.
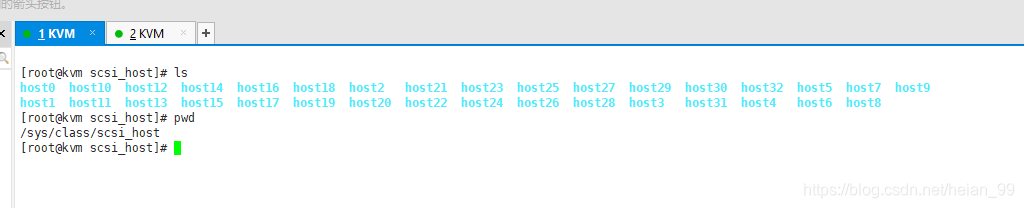
Because there can be many SCSI host ports, scanning them one by one is slow. I generated a list first:
ls | sort > /opt/host.txt
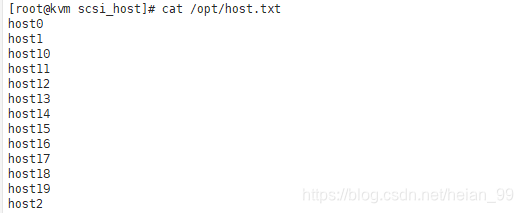
Then I used a small batch script:
#!/bin/bash
DIR="/sys/class/scsi_host/"
for i in `cat host.txt`
do
echo "- - -" > $DIR$i/scan
echo $DIR$i/scan
done
rm -rf /opt/host.txt
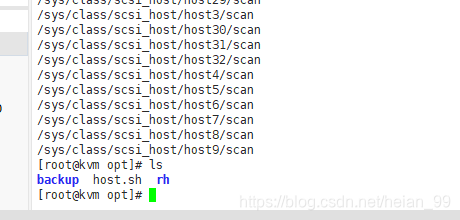
I ran it from /opt:
[root@kvm opt]# ls
backup  host.sh  host.txt  rh
[root@kvm opt]# pwd
/opt
[root@kvm opt]# bash host.sh
The new 10G disk showed up as /dev/sdb.
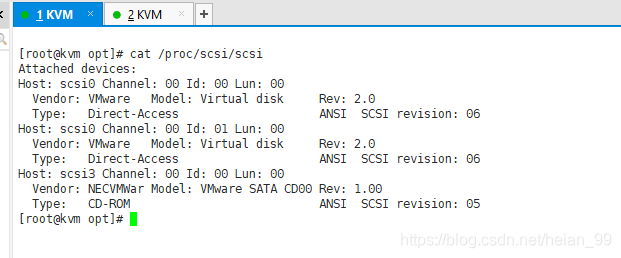
A quick check of the SCSI state confirmed the setup was correct before moving on:
cat /proc/scsi/scsi
2. Partition the new disk
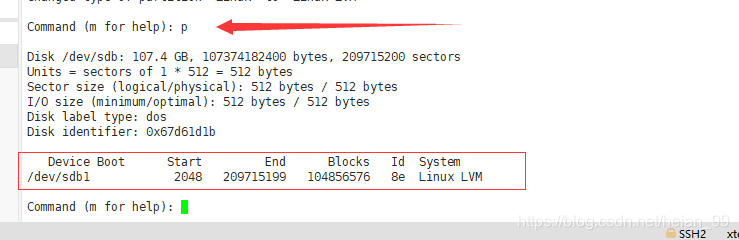
I created a primary partition on the new disk. The default partition number was 1, so the result was /dev/sdb1.
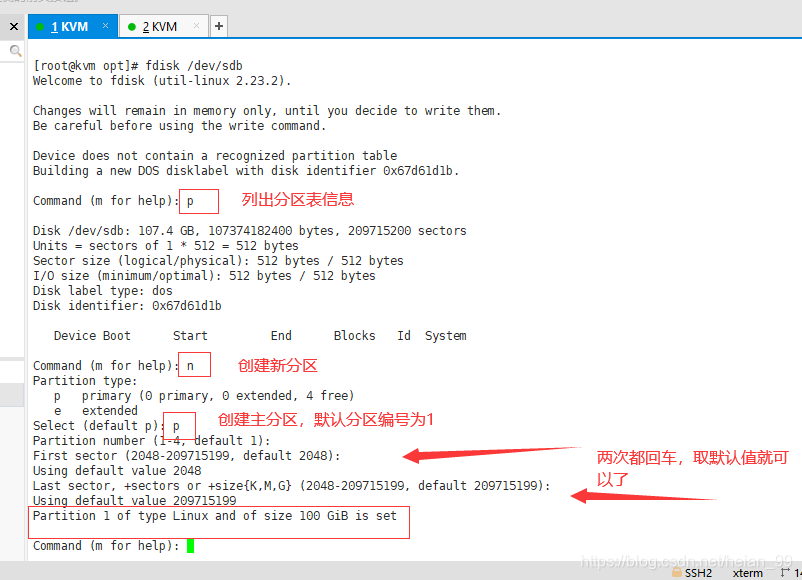
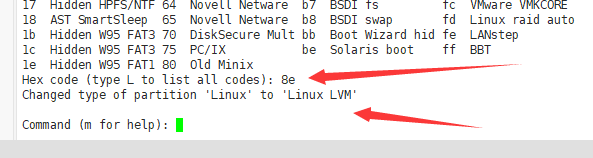
Since LVM would manage this space, I changed the partition type to 8e, the Linux LVM type.
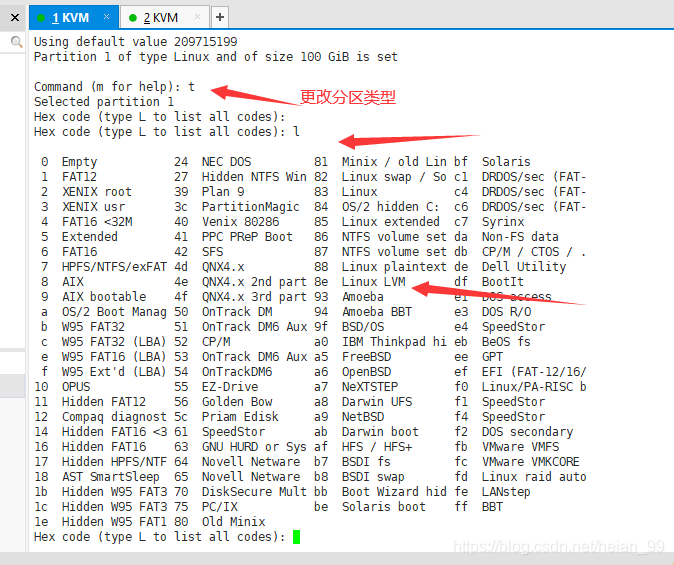
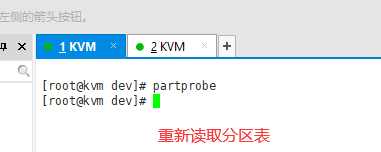
After that, the partition information showed /dev/sdb1 with type 8e. I reread the partition table to refresh it.
3. Add the partition to LVM
With the partition in place, I turned /dev/sdb1 into a new physical volume.
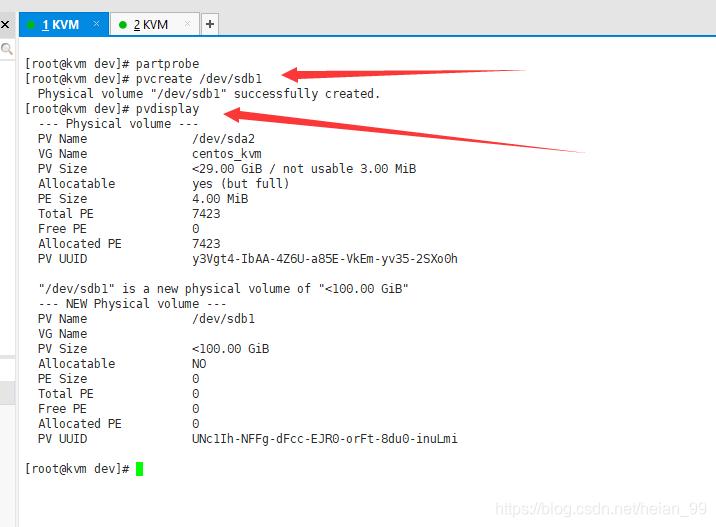
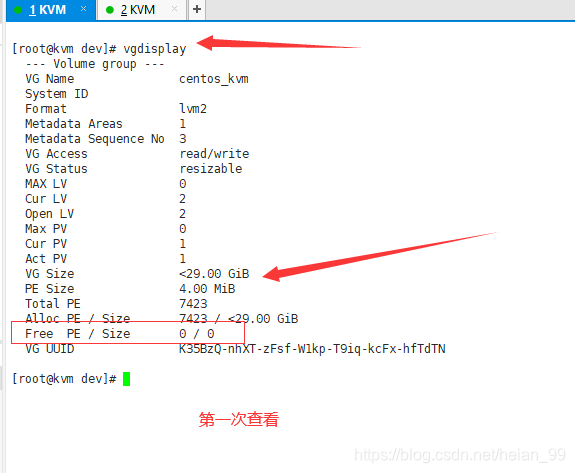
Next, vgdisplay showed the existing volume group had no free space. The group is shown as centos_kvm in my output. To make the new space usable, I added the new physical volume to that volume group:
vgextend centos_kvm /dev/sdb1
Volume group "centos_kvm" successfully extended
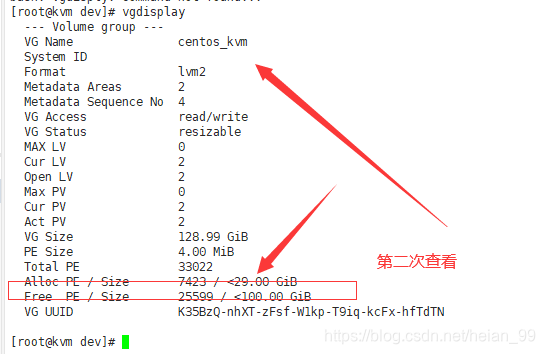
Running vgdisplay again showed 10G free, so the newly added disk was now available for allocation.

4. Extend the logical volume
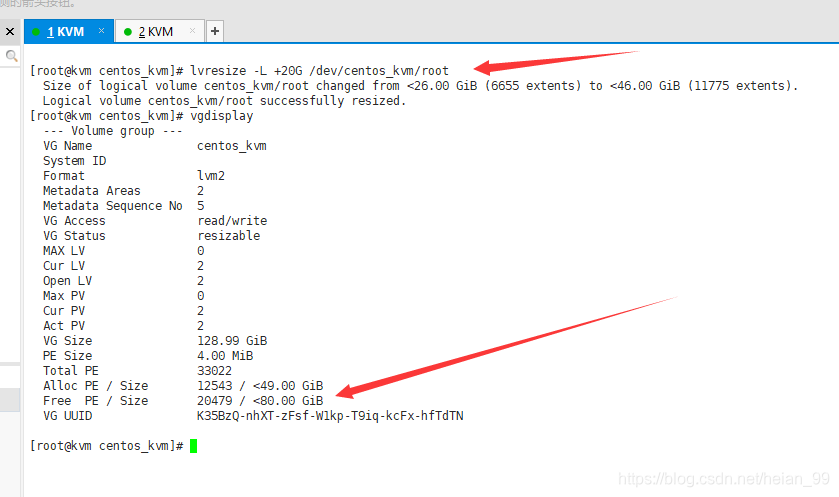
The final allocation step is to extend the logical volume that backs the existing partition. In the example, the root logical volume was extended by 20G:
[root@kvm centos_kvm]# lvresize -L +20G /dev/centos_kvm/root
Size of logical volume centos_kvm/root changed from <26.00 GiB (6655 extents) to <46.00 GiB (11775 extents).
Logical volume centos_kvm/root successfully resized.
[root@kvm centos_kvm]# vgdisplay
--- Volume group ---
VG Name centos_kvm
System ID
Format lvm2
Metadata Areas 2
Metadata Sequence No 5
VG Access read/write
VG Status resizable
MAX LV 0
Cur LV 2
Open LV 2
Max PV 0
Cur PV 2
Act PV 2
VG Size 128.99 GiB
PE Size 4.00 MiB
Total PE 33022
Alloc PE / Size 12543 / <49.00 GiB
Free PE / Size 20479 / <80.00 GiB
VG UUID K35BzQ-nhXT-zFsf-W1kp-T9iq-kcFx-hfTdTN
If the target is a different logical volume, such as var, use the corresponding path. The same pattern applies.
5. Grow the filesystem
Resizing the logical volume is not the last step. The filesystem must also recognize the new capacity. On CentOS 7 with XFS, the command is xfs_growfs; on CentOS 6.x, resize2fs is used instead. For the var volume in this case, the filesystem growth command was:
xfs_growfs /dev/centos/var
That step makes the additional capacity visible to the filesystem. The new disk space added during the LVM extension is then usable.
There is another option after adding a partition to the volume group: create a separate logical volume of the required size and mount it independently. In that case, remember to update /etc/fstab; otherwise the mount will not survive a reboot.
lvcreate -L 4G -n newlv centos  # Create a 4G logical volume named newlv from free space in the centos volume group
mkfs.xfs /dev/centos/newlv      # Format the new newlv as an xfs filesystem
Instead of creating a new logical volume, you can also extend the free space directly into an existing mounted partition. That is the approach used above.
6. Reversing the change
LVM is flexible in both directions: if you can add space, you can also take it away. To shrink back an existing logical volume by removing the added capacity:
lvreduce -L -10G /dev/centos/var
If you created a separate logical volume instead, remove it:
lvremove /dev/centos/newlv1
Then remove the disk partition from the volume group:
vgreduce centos /dev/sdb1
Remove it from the physical volume layer:
pvremove /dev/sdb1
Finally, remove the virtual hardware in ESXi.
Used this way, LVM is genuinely pleasant to work with, especially on an ESXi host: you can add storage and extend capacity without taking the VM down.