Git is a widely used version control system for software development. It lets you track and manage different versions of code inside a repository. Installing it is straightforward on Windows, Linux, and macOS, whether you use an official installer, a trusted package source, or build it yourself from source. After installation, you can confirm it is available by running git version in a terminal.
Before doing any real work with Git, it needs to be installed on your machine. Even if it is already present, updating to a current version is often a good idea. You can install it from a package manager, through a platform-specific installer, or by compiling the source code yourself.
Note
The version used when this material was written was 2.8.0. Most commands shown here work even with much older Git releases, though a small number may behave differently or be unavailable on older versions. Git has a strong record of backward compatibility, so the commands used here should also remain valid on versions newer than 2.8.
Installing Git on Linux
On Linux, the easiest way to install the standard Git tools is usually through your distribution’s package manager.
For Fedora and closely related RPM-based distributions such as RHEL or CentOS, you can use dnf:
$ sudo dnf install git-all
For Debian-based distributions such as Ubuntu, use apt:
$ sudo apt install git-all
There are additional installation instructions for a range of Unix-like distributions on Git’s official Linux download page: https://git-scm.com/download/linux
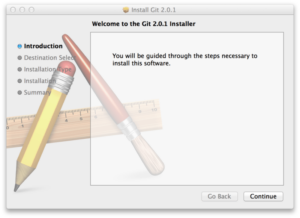
Installing Git on macOS
There is more than one way to install Git on a Mac. The simplest is often to install the Xcode Command Line Tools. On Mavericks (10.9) and later, you can usually trigger this by trying to run Git in Terminal for the first time:
$ git --version
If the command line developer tools are not already installed, macOS should prompt you to install them.
If you want a newer Git release, you can use the official macOS binary installer, available from Git’s download page: https://git-scm.com/download/mac
You can also install Git as part of GitHub for macOS. Its graphical tools include an option to install command line tools as well. That package has been available from: https://mac.github.com
Installing Git on Windows
Windows users also have several installation options.
The official Windows download is available from Git’s website. Visiting the following page starts the download automatically: https://git-scm.com/download/win
It is worth noting that this installer comes from the Git for Windows project, also known historically as msysGit, which is a separate project from Git itself. More details are available at: http://msysgit.github.io/
For automated installation, you can also use the Git package provided through Chocolatey. Keep in mind that the Chocolatey package is maintained by the community.
Another simple route is to install GitHub Desktop. Its installer includes both graphical tools and a command-line Git setup. It also supports PowerShell, includes reliable credential caching, and provides sensible line-ending configuration.
Building Git from Source
Some users prefer compiling Git from source because it can provide the newest release sooner than binary packages. In practice, that gap is less significant than it once was, since Git has become a mature and widely packaged tool.
If you decide to build from source, you will need the libraries Git depends on: autotools, curl, zlib, openssl, expat, and libiconv. On systems with dnf or apt, you can install the minimum required dependencies like this:
$ sudo dnf install dh-autoreconf curl-devel expat-devel gettext-devel \
  openssl-devel perl-devel zlib-devel
$ sudo apt-get install dh-autoreconf libcurl4-gnutls-dev libexpat1-dev \
  gettext libz-dev libssl-dev
If you also want documentation formats such as doc, html, and info, install these additional packages:
$ sudo dnf install asciidoc xmlto docbook2X
$ sudo apt-get install asciidoc xmlto docbook2x
Users of RHEL and related distributions such as CentOS and Scientific Linux need to enable the EPEL repository in order to obtain the docbook2X package.
On Debian-based systems, including Debian and Ubuntu derivatives, you also need the install-info package:
$ sudo apt-get install install-info
On RPM-based systems such as Fedora, RHEL, and related distributions, you also need getopt:
$ sudo dnf install getopt
That package is typically already installed on Debian-based systems.
Fedora, RHEL, and similar systems also require the following symlink because of a binary naming difference:
$ sudo ln -s /usr/bin/db2x_docbook2texi /usr/bin/docbook2x-texi
Once the required dependencies are in place, you can download the latest release tarball from either of these locations:
- https://www.kernel.org/pub/software/scm/git
- https://github.com/git/git/releases
GitHub usually hosts the newest release quickly, while kernel.org also provides signed files, which can be useful if you want to verify the integrity of your download.
After downloading the source archive, compile and install it with:
$ tar -zxf git-2.8.0.tar.gz
$ cd git-2.8.0
$ make configure
$ ./configure --prefix=/usr
$ make all doc info
$ sudo make install install-doc install-html install-info
When the installation is finished, Git can even be used to fetch updates to Git itself:
$ git clone git://git.kernel.org/pub/scm/git/git.git
Whatever installation path you choose, it is a good idea to verify that everything worked by checking the installed version from the terminal.