Electron development on Windows is straightforward in principle, but in practice the setup can become awkward when key packages, headers, and build dependencies are fetched from overseas servers. A working environment needs more than just Node.js and Electron itself: native modules may have to be rebuilt, Electron uses its own matching headers, and packaging tools often download extra binaries at build time.
The process below walks through a complete baseline setup and verifies it by packaging an app with electron-builder.
Environment and dependency versions
The setup uses these components:
- Visual Studio 2019 Community
- Node.js (v12.16.1 32-bit)
- Python (3.8.2 32-bit)
All three are 32-bit on purpose, so the final packaged application can still run on 32-bit Windows.
Installing the required software
Visual Studio 2019 Community
Visual Studio is necessary because some Electron dependencies need to be rebuilt before they can run correctly. SQLite is a typical example. For a usable Electron development environment on Windows, the C/C++ toolchain is the important part.
Installing only the C/C++ workload keeps the download smaller and avoids wasting disk space.
https://docs.microsoft.com/en-us/visualstudio/install/create-an-offline-installation-of-visual-studio?view=vs-2019
After downloading vs_community.exe, this command creates an offline installer:
vs_community.exe --layout d:\vslayout --add Microsoft.VisualStudio.Workload.NativeDesktop --includeRecommended --lang en-US
Once the files are downloaded, run vs_community.exe and finish the installation. After installation, start Visual Studio once to confirm everything completed normally.
Python 3
There is nothing unusual to watch for here. If you download Python from the official site, the main download button usually points to the 64-bit build, so the 32-bit package has to be selected from the additional downloads.
Many older guides insist on Python 2.7, but that was tied to older node-gyp behavior. Current versions already support Python 3.x.
Node.js
Node.js installation is also straightforward: just download the 32-bit release.
If you already know the exact version you want, a direct download link can be used by replacing the version in the URL:
https://nodejs.org/dist/v8.11.3/node-v8.11.3-x86.msi
Yarn (optional, but recommended)
Yarn is worth using here because package installation is generally faster than with npm.
1) Move the cache directory
Check the current cache location:
yarn cache dir

C:\Users\Administrator\AppData\Local\Yarn\Cache\v2
By default, this ends up on the system drive. Moving it to another drive such as D: makes cache management easier and saves space on C:.
yarn config set cache-folder D:\YarnCache
2) Switch the registry
The default registry can be slow to reach. Changing it to the Taobao registry speeds up package downloads considerably.
Check the current registry:
yarn config get registry

https://registry.yarnpkg.com
Switch to the Taobao registry:
yarn config set registry https://registry.npm.taobao.org

yarn config get registry
https://registry.npm.taobao.org
Verify the installed tools
Before touching Electron itself, confirm the versions:
PS C:\Users\dong> python --version
Python 3.8.2
PS C:\Users\dong> node -v
v12.16.1
PS C:\Users\dong> yarn -v
1.22.0
PS C:\Users\dong>
Clone the official demo
Use Electron’s quick-start example as a test project:
git clone https://github.com/electron/electron-quick-start

cd electron-quick-start
Point Electron downloads to a domestic mirror
When Electron is installed, it downloads a prebuilt dist package. By default, this comes from GitHub, which is often extremely slow or unavailable. Setting a mirror solves that problem.
Temporary environment variable
# cmd
set ELECTRON_MIRROR=https://cdn.npm.taobao.org/dist/electron/

# powershell
$Env:ELECTRON_MIRROR="https://cdn.npm.taobao.org/dist/electron/"
Permanent environment variable
Open:
Computer - Properties - Advanced system settings - Environment Variables - New user variable
Set:
- Variable name:
ELECTRON_MIRROR - Variable value:
https://cdn.npm.taobao.org/dist/electron/
If the variable is added permanently, reopen the terminal afterward.
A useful extra detail: npm can print Electron download logs if DEBUG is set.
set DEBUG=@electron/get:*(cmd)$env:DEBUG="@electron/get:*"(powershell)
To test whether the mirror is working:
yarn global add [email protected]
Downloaded Electron files are cached under:
C:\Users\用户名\AppData\Local\electron\Cache
There is also an older mirror address that was commonly used:
http://npm.taobao.org/mirrors/electron/
With newer Electron versions, this may appear broken because the path format does not match the default installer behavior. Compare the two forms:
https://cdn.npm.taobao.org/dist/electron/v8.1.0/electron-v8.1.0-win32-ia32.zip
https://npm.taobao.org/mirrors/electron/8.1.0/electron-v8.1.0-win32-ia32.zip
One path includes v in the directory name, the other does not. Newer Electron install scripts expect the versioned path with v, so the older mirror can return a 404 unless a custom directory is set manually.
set ELECTRON_MIRROR=https://npm.taobao.org/mirrors/electron/

set ELECTRON_CUSTOM_DIR=8.1.0
After ELECTRON_CUSTOM_DIR is set, the installer can find the correct path again. Even so, the cdn.npm... mirror is still the simpler choice.
At that point, dependency installation for the demo can proceed with yarn.
Download the Node.js headers
Some dependencies need to be compiled locally before they can be used. This is how native Node modules stay portable across platforms. To compile them, the local Node.js headers must be available.
First install node-gyp globally:
# 全局安装 node-gyp
yarn global add node-gyp
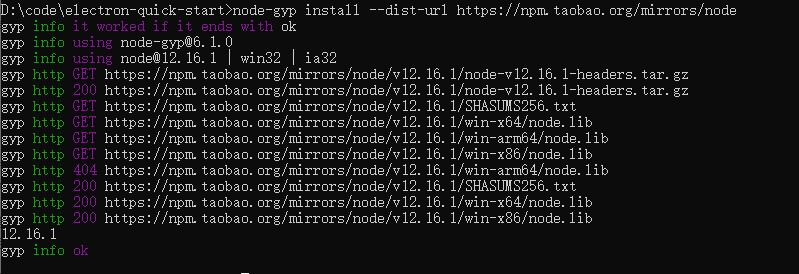
Then download headers for the Node.js version installed on the machine:
node-gyp install --dist-url https://npm.taobao.org/mirrors/node
Download the headers Electron actually needs
Electron supports native Node modules, but it does not use the exact same runtime as official Node.js. Since Electron ships with a modified V8 environment, a module compiled only against the local Node.js headers may work under plain Node but still fail inside Electron.
That is why Electron-native rebuilding is needed.
Although electron-gyp is often mentioned in this context, it does not have to be run directly here. electron-builder already integrates the necessary rebuild logic through its own tooling.
The first thing to check is which Node version the Electron build is using internally.
yarn start
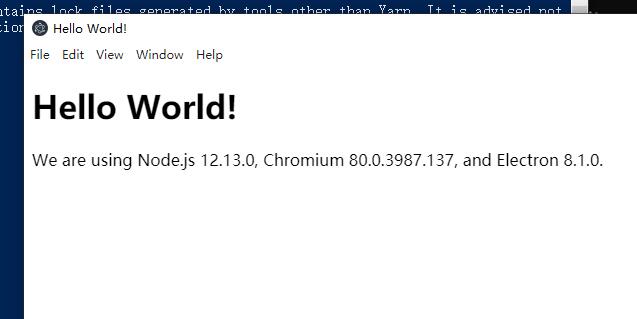
The demo shows v12.13.0, while the local machine in this setup uses v12.16.1.
The practical conclusion is that the rebuild process depends on the Node version bundled inside Electron, not the standalone Node.js version installed on the system. Based on that, download the matching headers:
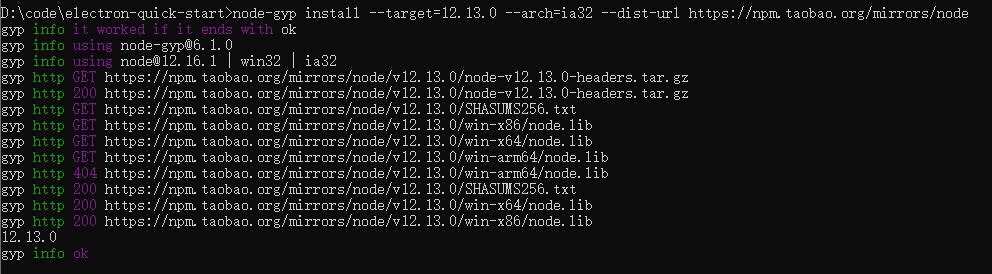
# 下载页面显示的 12.13.0 版本头文件
node-gyp install --target=12.13.0 --arch=ia32 --dist-url https://npm.taobao.org/mirrors/node
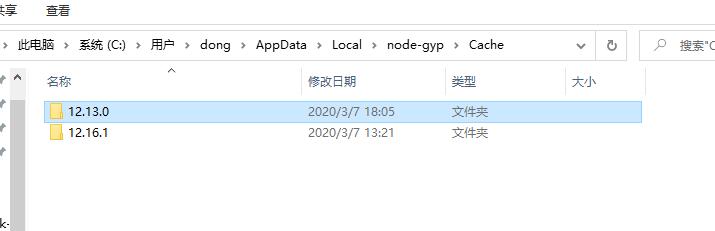
These headers are stored under:
C:\Users\用户名\AppData\Local\node-gyp\Cache
Copy the headers to where Electron expects them
electron-builder provides the install-app-deps command, which can rebuild native dependencies whenever new packages are added. However, there is an inconvenient mismatch:
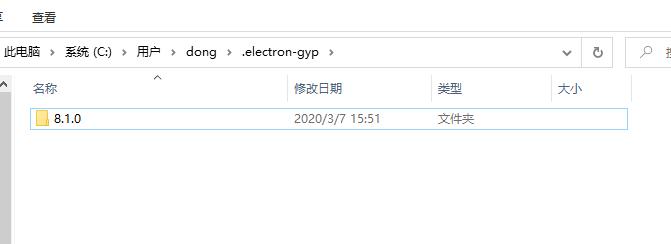
node-gypstores headers inC:\Users\用户名\AppData\Local\node-gyp\Cacheinstall-app-depslooks for them inC:\Users\用户名\.electron-gyp
If the headers are missing there, the tool tries to download them again from overseas.
The workaround is manual but effective:
Copy C:\Users\用户名\AppData\Local\node-gyp\Cache\12.13.0 into C:\Users\用户名\.electron-gyp, then rename the copied 12.13.0 folder to 8.1.0 because the Electron version in use is 8.1.0. install-app-deps searches by Electron version, even though the actual header content corresponds to Node.js.
There has long been confusion around what node-gyp --target is supposed to mean. Some references describe it as the Electron version, others as the Node.js version. The stronger interpretation here is that it refers to the Node.js version, because the downloaded files are clearly Node headers. The confusion is understandable, though: Electron builds do need those Node headers, and historical changes across older tooling versions did not help.
This copy-and-rename method works for rebuilding in practice.
Install and configure electron-builder
For Windows packaging, electron-builder is one of the easiest options.
Install it as a development dependency:
λ yarn add electron-builder --dev
20.28.4

λ electron-builder --version
22.3.6
Then add the rebuild command in package.json and keep Electron plus electron-builder in devDependencies:
{
  "name": "electron-quick-start",
  "version": "1.0.0",
  "description": "A minimal Electron application",
  "main": "main.js",
  "scripts": {
    "start": "electron ."
  },
  "repository": "https://github.com/electron/electron-quick-start",
  "keywords": [
    "Electron",
    "quick",
    "start",
    "tutorial",
    "demo"
  ],
  "author": "GitHub",
  "license": "CC0-1.0",
  "devDependencies": {
    "electron": "^8.1.0",
    "electron-builder": "^22.3.6"
  }
}
Create buildScript.js:
"use strict";

const builder = require("electron-builder");
const Platform = builder.Platform;

builder.build({
  "targets": Platform.WINDOWS.createTarget(),
  "config": {
    "productName": "electron-aha",
    "compression": "normal",
    "electronVersion": "8.1.0",
    "directories": {
      "output": "./elect_builder_output"
    },
    "asar": true,
    "asarUnpack": [
      "dist"
    ],
    "win": {
      "target": [
        "nsis"
      ],
      "legalTrademarks": "公司名称",
      "files": [
        "!logs",
        "!databases"
      ]
    },
    "nsis": {
      "shortcutName": "aha",
      "oneClick": false,
      "perMachine": true,
      "allowToChangeInstallationDirectory": true
    },
    "extraFiles": [
      "bin",
      "dist",
      "config.json"
    ]
  }
})
.then(() => {
    // handle result
    console.log('Build OK!');
})
.catch((error) => {
    // handle error
    console.log(error);
})
For more advanced packaging behavior, electron-builder’s own documentation remains the reference point.
Set the mirror for electron-builder binaries
Packaging often stalls at this stage because electron-builder still downloads its own dependencies from GitHub, especially winCodeSign and NSIS.
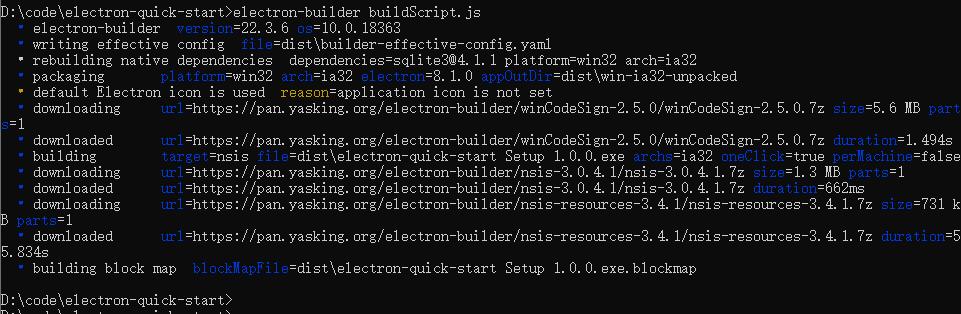
Run the build command from the project root:
node buildScript.js
If the process hangs, the output usually looks like this:
?[34m  •?[0m downloading               ?[34mparts?[0m=1 ?[34msize?[0m=4.9 MB ?[34murl?[0m=https://github.com/electron-us
erland/electron-builder-binaries/releases/download/winCodeSign-2.3.1/winCodeSign-2.3.1.7z

...

4murl?[0m=https://github.com/electron-userland/electron-builder-binaries/release
s/download/nsis-3.0.3.2/nsis-3.0.3.2.7z
The binaries come from:
https://github.com/electron-userland/electron-builder-binaries/releases
To avoid that download bottleneck, set the binary mirror environment variable:
set ELECTRON_BUILDER_BINARIES_MIRROR=https://pan.yasking.org/electron-builder/
After that, run the build again.
Downloaded files are cached here by default:
C:\Users\用户名\AppData\Local\electron-builder\Cache
Final check
Run the packaging command one more time:
node buildScript.js
If the mirrors and headers are in place, the process should complete normally. The generated installer will be placed in the elect_builder_output directory.
At that point, the Electron environment is fully usable: dependencies can be installed, native modules can be rebuilt correctly, and Windows packages can be produced without repeatedly getting stuck on overseas downloads.