On some XPEnology DSM systems, the Web interface may suddenly stop opening. Accessing the NAS through its IP address and port, whether by HTTP or HTTPS, only returns the message: “Sorry, the page you requested does not exist.”
In this case, reinstalling DSM is not necessarily required. If SSH is still available, the repair can be done remotely by checking which shared libraries are missing and copying them back from the original DSM installation image.
There may also be follow-up problems after the Web UI becomes accessible again. For example, installing VPN Service may report that something cannot be found, or Storage Manager may fail to display information correctly. That usually means the first repair only restored part of the missing dependencies, and other .so files under the system library path are still absent or damaged.
Environment used here
- XPEnology DSM 6.1.7-15284 Update 3
- SSH enabled
Symptoms
The DSM Web page cannot be opened normally. Visiting the NAS IP and DSM port shows only the error page saying that the specified page does not exist.
SSH access still works, and commands related to synoscgi can be executed successfully.
Checking the processes with:
ps -ef **\|** grep synoscgips -ef **\|** grep defunct
shows that synoscgi and its child processes are running, but index.cgi has become a zombie process. This detail may differ from other repair guides, but the underlying cause can still be the same: DSM’s Web UI is missing required shared library files.
Cause
The problem is caused by missing dependency files. In this case, the /lib directory lacked some .so system libraries required by the Web UI.
The exact missing files may vary from one installation to another. The repair method is the same: download the matching DSM .pat image, find the missing files from the logs, extract them from the original image, copy them back into the system directory, then reboot DSM.
1. Download the matching DSM image
Download the official DSM .pat image that matches both the DSM version and the model used by the XPEnology installation.
This part matters. Using the wrong model image can create new abnormalities. For example, using a DS918 image on a system that is actually running as DS3617 may result in system information not displaying properly.
If the wrong image has already been used, it is usually enough to download the correct one and repeat the extraction and replacement process with the proper files.
2. Check which dependency files are missing
Enter the /var/log/upstart directory and inspect the synoscgi log:
sudo -i \# root权限cd /var/log/upstartcat synoscgi.log
In the case shown here, the log reported that libsynotls.so.6 and libsynosso.so.6 could not be loaded.

3. Extract the missing files from the original DSM image
Use an archive tool such as 7z to unpack the .pat image.
After that, extract hda1.tgz. Then open the extracted hda1 file, which has no file extension, with the archive tool again.
Go to /usr/lib inside the extracted file structure, locate the missing .so files reported by the log, and extract them.

Upload the extracted files to the NAS. This can be done with scp; on Windows, WinSCP can also be used.
scp -r **\[**解压出来的文件路径**\]** admin@**\[**群晖IP**\]**:/tmp

Then connect to DSM over SSH and move the files into /lib. Also change the owner to root:
sudo -imv /tmp/**\[**你的缺失文件.so**\]** /libcd /libchown root:root **\[**你的缺失文件.so**\]**
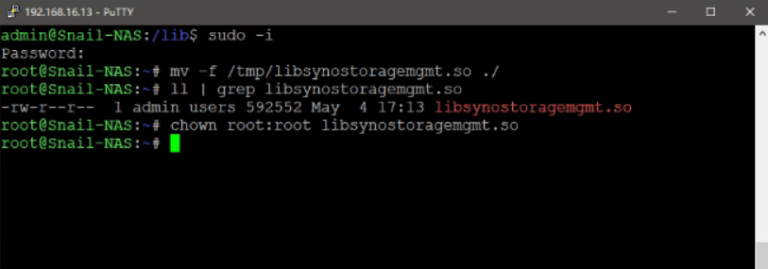
If the permission is incorrect and is not -rw-r–r–, set it to 644:
chmod 644 **\[**你的缺失文件.so**\]**
If the missing file is supposed to be a symbolic link, compare it with the original DSM image and create the link manually:
ln -s **\[**你的缺失文件.so**\]** **\[**缺失文件名**\]**.so
4. Reboot DSM and continue checking the logs if needed
After copying the missing libraries back, reboot DSM.
If the Web interface opens but some DSM components still behave abnormally, do not assume the repair is finished. Check the logs again. There may be additional missing shared libraries.
One example is Storage Manager failing to show storage information because libsynonvme.so.1 is still missing.

The same approach applies: identify the missing file from the log, extract the correct version from the matching DSM image, copy it into the proper system directory, fix owner and permissions, create symbolic links if necessary, and reboot again.