A bit of rambling first
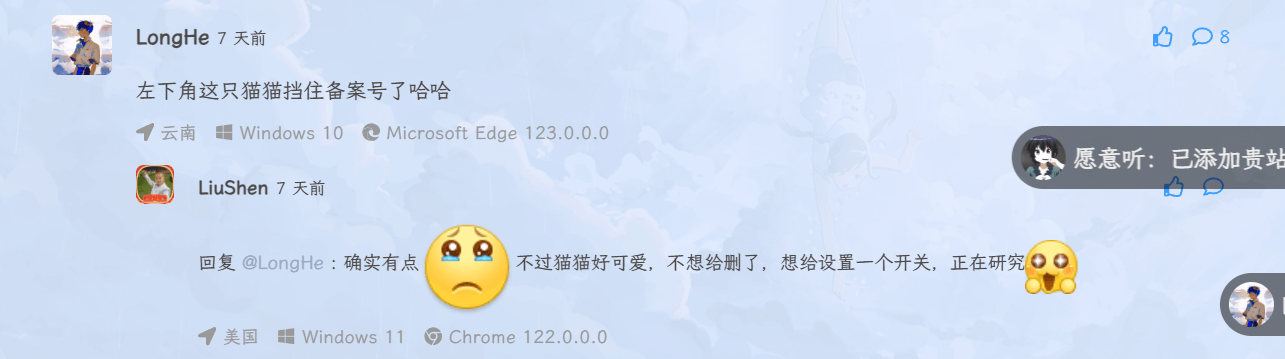
A few days ago, someone pointed out that the little Live2D cat on the site was covering the ICP filing number. On my own computer it looked fine, so at first I just replied that I was “working on it” — which, to be honest, meant I had looked into it before and then left it there because I was too lazy to finish it QAQ.
Then I searched around again and found that deliberately blocking the ICP number can lead to the filing being revoked, and may even bring a fine. That scared me into finally adding a way to hide the cat. But a single tiny feature felt a bit too thin for a whole note, so this time I’m also adding two things I recently finished: a frosted-glass background effect and a QWeather widget in the upper-right corner.
Some rambling
Adding a Live2D toggle to the right-click menu
Before doing this, I did what everyone does first: searched online to see whether someone had already written a tutorial. I didn’t really find one that matched what I wanted, so I used my very limited JS knowledge gathered from previous theme hacking and made one myself.
First, right-click the Live2D model — from here on I’ll just call it the cat — and choose Inspect. The source looks like this. You can also try searching for Live2d in the inspector:
<div
  id="live2d-widget"
  class="live2d-widget-container"
  style="position: fixed; left: 0px; bottom: -140px; width: 250px; height: 500px; z-index: 99999; opacity: 1; pointer-events: none;"
>
  <canvas
    id="live2dcanvas"
    width="500"
    height="1000"
    style="position: absolute; left: 0px; top: 0px; width: 250px; height: 500px;"
  ></canvas>
</div>
The important part is that its ID is live2d-widget. I also checked that there was only one element using this ID, so there was no risk of selecting the wrong thing. Then I tested it directly in the browser console:
const live2dWidget = document.getElementById("live2d-widget");
live2dWidget.style.display = "none";
/*这个none是我查的,在CSS中,display: none;表示元素不可见且不占据空间,相当于隐藏元素;而display: block;表示元素以块级元素显示,会占据一整行的空间并显示出来。*/
After testing, when live2dWidget.style.display is set to an empty value or block, the cat appears. When it is set to none, the cat disappears. So all that’s needed is a button to switch between these states.
I decided to put the button in the custom right-click menu. If your Butterfly theme does not already have a modified right-click menu, you’ll need to set that up first.
In the file [blogRoot]\themes\butterfly\layout\includesrightmenu.pug, add a menu item for showing and hiding the cat. Pay attention to indentation and keep it aligned with the surrounding items. The plus signs below only mark the added lines; remove them when actually writing the file:
#rightMenu
    .rightMenu-group.rightMenu-small
        .rightMenu-item#menu-backward
            i.fa-solid.fa-arrow-left
        .rightMenu-item#menu-forward
            i.fa-solid.fa-arrow-right
        .rightMenu-item#menu-refresh
            i.fa-solid.fa-arrow-rotate-right
        .rightMenu-item#menu-home
            i.fa-solid.fa-house
    .rightMenu-group.rightMenu-line.hide#menu-text
        a.rightMenu-item(href="javascript:rm.copySelect();")
            i.fa-solid.fa-copy
            span='复制'
    .rightMenu-group.rightMenu-line.rightMenuOther
        a.rightMenu-item.menu-link(href='/archives/')
            i.fa-solid.fa-archive
            span='文章时间线'
        a.rightMenu-item.menu-link(href='/categories/')
            i.fa-solid.fa-folder-open
            span='文章分大类'
        a.rightMenu-item.menu-link(href='/tags/')
            i.fa-solid.fa-tags
            span='文章小标签'
    .rightMenu-group.rightMenu-line.rightMenuNormal
        a.rightMenu-item.menu-link#menu-radompage(href='/comment/index.html')
            i.fa-solid.fa-shoe-prints
            span='随心留言板'
        .rightMenu-item#menu-translate
            i.fa-solid.fa-earth-asia
            span='繁简模式切换'
        .rightMenu-item#menu-darkmode
            i.fa-solid.fa-moon
            span='切换亮暗模式'
+        .rightMenu-item#menu-live2dvisibility
+            i.fa-solid.fa-cat
+            span='小猫显示隐藏'
        .rightMenu-item#menu-print
            i.fa-solid.fa-print.fa-fw
            span='打印整个页面'
#rightmenu-mask
At this point, after running the usual Hexo commands, the button itself should already show up. Next, add the function behind it.
Open the JavaScript file that handles the right-click menu actions. In my setup, that file is [BlogRoot]\source\config\js\rightmenu.js. Add the following:
// 设置小猫的显示和隐藏
function toggleLive2dVisibility() {
    removeRightMenu(); // 点击按钮后移除右键菜单,这个看你们自己的函数是不是这个
    const live2dContainer = document.getElementById('live2d-widget');
    if (live2dContainer.style.display === 'block' || live2dContainer.style.display === '') {
        live2dContainer.style.display = 'none'; // 显示Live2D模型
    } else {
        live2dContainer.style.display = 'block'; // 隐藏Live2D模型
    }
}

……

// 小猫隐藏的绑定事件
$('#menu-live2dvisibility').on('click', function () {
    toggleLive2dVisibility();
});
The logic is very simple: close the right-click menu after the click, find the Live2D container, check its current display value, and switch it between visible and hidden. That gives us a much more obedient cat.
There is still one annoying little problem: the button works, but visitors may not know it exists. I wanted to add a hint message, only to discover that my cat is a bit too silly and does not support tooltips or dialogue prompts. So that part has to wait for a later update.
Making the site cards look like frosted glass
This part is easier. The old style used a translucent background. It looked fine, but compared with a proper frosted-glass effect, it still felt like something was missing.
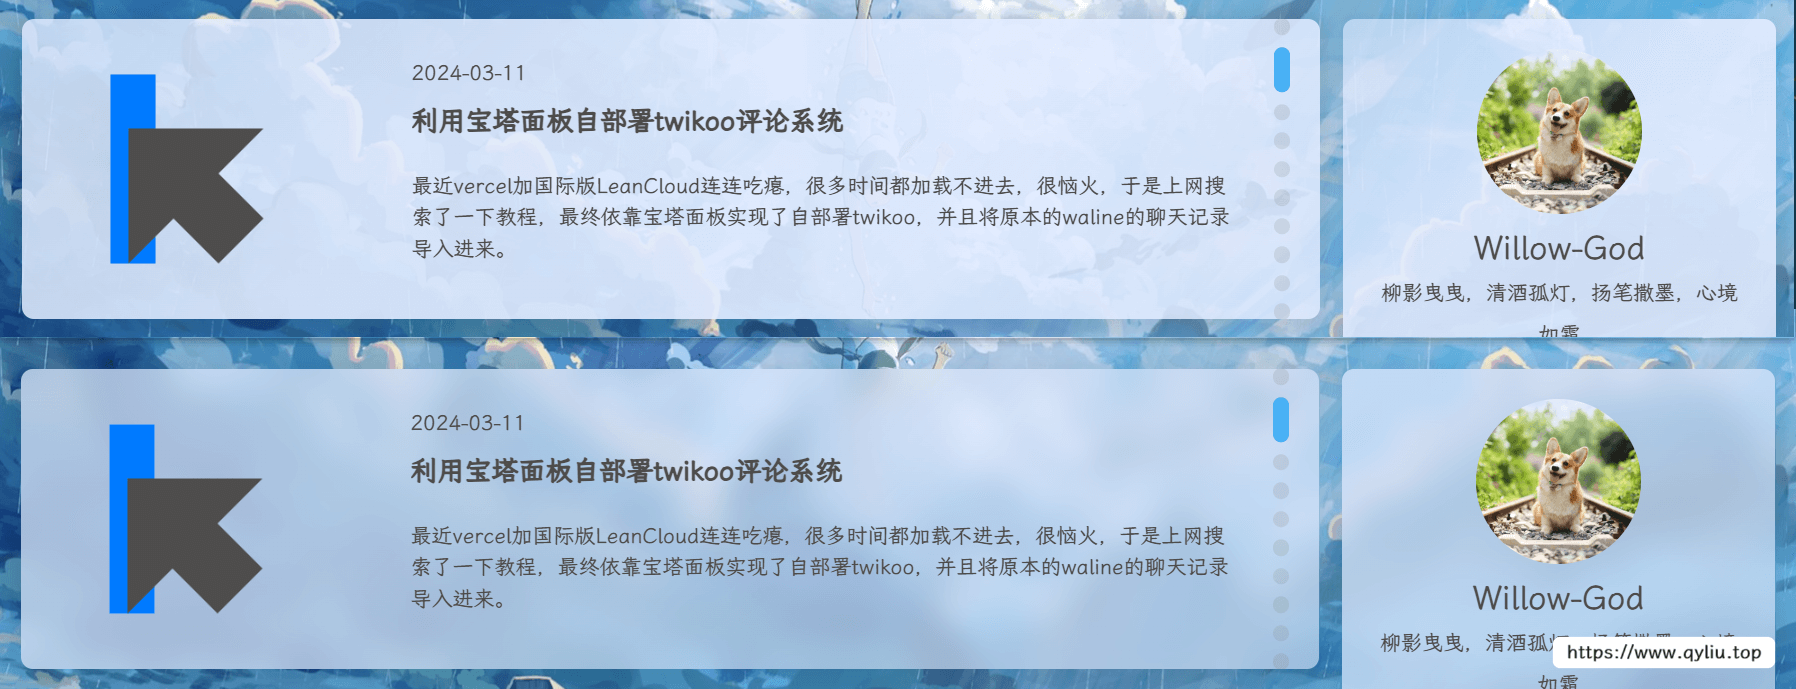
Translucent on top, frosted glass below
Of course, everyone has different taste. Some people prefer a simple transparent panel, and some like the blurrier look. The basic idea is to find the element you want to style and then write CSS for it.
Take the sidebar profile card with the avatar as an example. Inspect it first:

Look at its ID and class
Its parent ID is aside-content, and the card itself has the classes card-widget and card-info. In CSS, an ID is selected with #, and a class is selected with .. Since the ID belongs to the parent element, the selector can be written like this:
#aside-content>.card-widget.card-info {
    ……
}
Now the background can be adjusted. First, here is a translucent gradient:
background: linear-gradient(
  -45deg,
  rgba(225, 235, 255, 0.6),
  rgba(225, 235, 255, 0.7),
  rgba(225, 235, 255, 0.7),
  rgba(225, 235, 255, 0.6)
);
This creates a linear gradient where the opacity changes from 60% to 70%, then 70% and back to 60%, moving diagonally from the upper-left direction toward the lower-right. It gives the card a little more depth. You can adjust the colors and opacity however you like.
For the frosted-glass version, add blur:
background: linear-gradient(
  -45deg,
  rgba(255, 255, 255, 0.6),
  rgba(255, 255, 255, 0.6),
  rgba(255, 255, 255, 0.7),
  rgba(255, 255, 255, 0.7)
);
backdrop-filter: blur(10px); /* 应用高斯模糊效果,可以根据需要调整模糊程度 */
-webkit-backdrop-filter: blur(10px); /* 兼容性前缀,适用于一些旧版本的浏览器 */
It is basically the same translucent background with a blur effect added. Personally, I prefer the blurred version.
After finishing the light-mode style, don’t forget dark mode. Butterfly can target dark mode by adding the [data-theme=dark] prefix. For example:
[data-theme="dark"] #aside-content > .card-widget.card-info {
  background: linear-gradient(
    -45deg,
    rgba(24, 40, 72, 0.6),
    rgba(35, 37, 58, 0.6),
    rgba(35, 37, 58, 0.7),
    rgba(24, 40, 72, 0.7)
  );
  backdrop-filter: blur(10px); /* 应用高斯模糊效果,可以根据需要调整模糊程度 */
  -webkit-backdrop-filter: blur(
    10px
  ); /* 兼容性前缀,适用于一些旧版本的浏览器 */
}
With that, the card can have separate glass-like backgrounds in light mode and dark mode. The same idea can be applied to other cards and panels on the page: inspect the target element, identify its ID and class, then write the matching CSS selector.
Adding a QWeather widget to the upper-right corner
The weather widget was something I had on the site for a while, but earlier it never looked quite right. It kept getting squeezed around by the top navigation bar. After simplifying some page elements recently, the compatibility finally became much better.
Start by opening the QWeather website, registering an account, entering the console, going to project management, and creating a plugin.
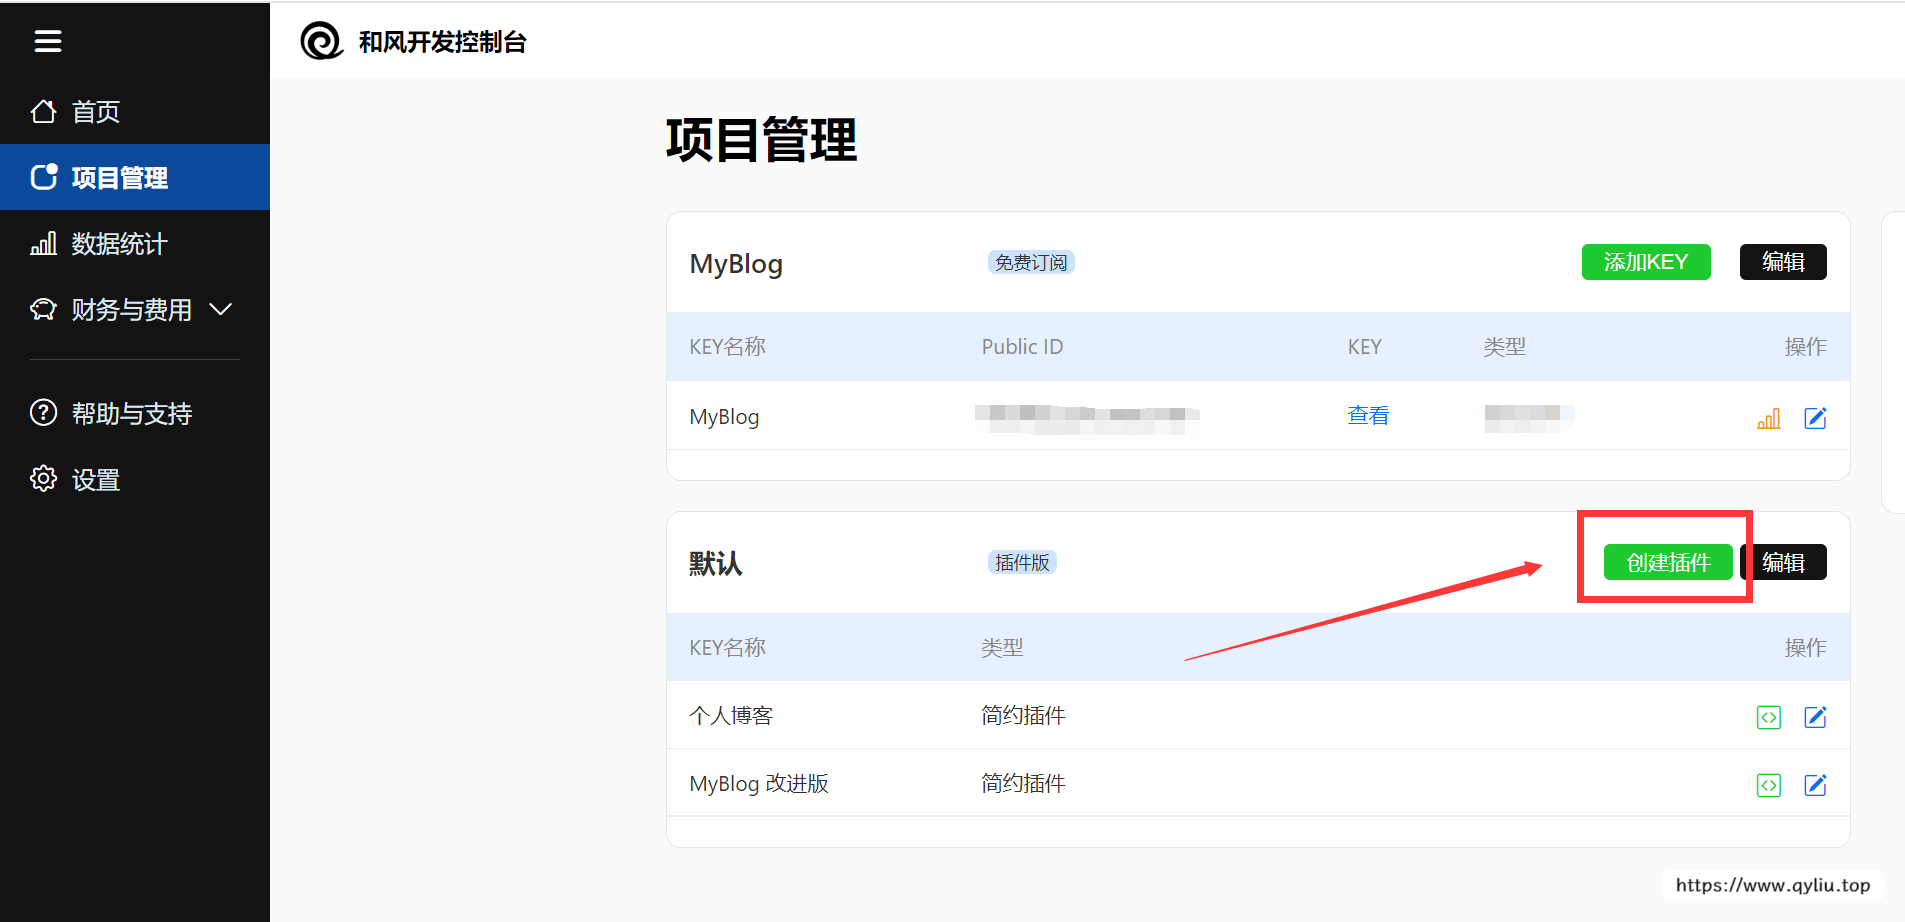
Create a plugin here
Then choose the simple weather widget and customize it:
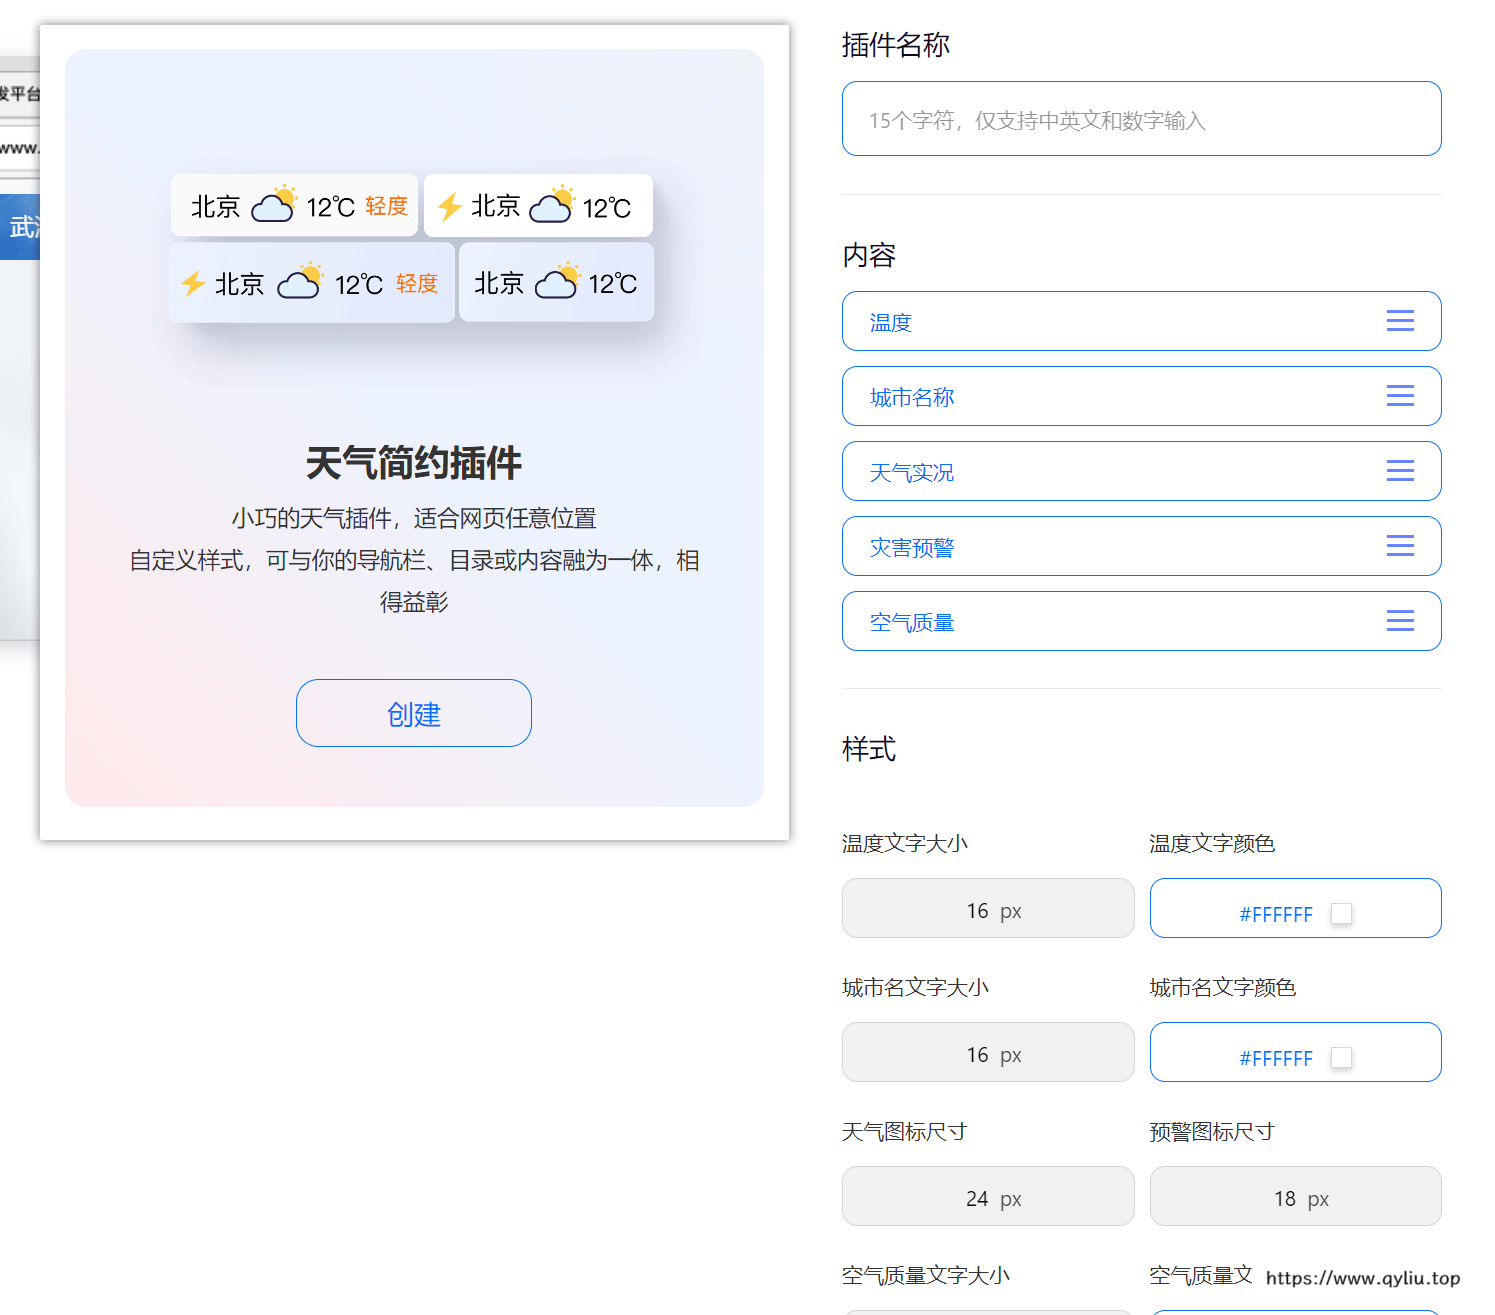
Click create first, then enter customization
The exact settings can be adjusted according to your own site style. Once the customization is finished, click Create and save the generated code. Try not to click Create repeatedly, because that will generate many small widgets. It does not really break anything, but cleaning them up later is annoying.
Here are the relevant custom parameters I used:
WIDGET = {
  CONFIG: {
    modules: "10",
    background: "1",
    tmpColor: "FFFFFF",
    tmpSize: "14",
    cityColor: "FFFFFF",
    citySize: "14",
    aqiColor: "FFFFFF",
    aqiSize: "14",
    weatherIconSize: "14",
    alertIconSize: "14",
    padding: "9px 10px 10px 9px",
    shadow: "1",
    language: "auto",
    borderRadius: "10",
    fixed: "false",
    vertical: "top",
    horizontal: "right",
    key: "ddddddddddddddddddddddddddddddddddddd",
  },
};
Take this part from the generated code and place it in your custom JS file. For example, I created [BlogRoot]\source\config\js\weather.js and put the configuration above into it. Be careful not to throw the whole generated snippet in there together with unrelated parts.
Then reference the following two scripts in your butterfly_config file. Again, the plus signs only mark the newly added lines and should not be copied:
inject:
  head:
    ……
  bottom:
    ……
+    - <script src="https://widget.qweather.net/simple/static/js/he-simple-common.js?v=2.0"></script>  # 天气插件官方js
+    - <script src="/config/js/weather.js"></script>  # 天气插件,后面会添加CDN
    ……
The next thing to decide is where to insert the widget. I wanted it on the right side of the top bar, so I opened [BlogRoot]\theme\butterfly\layout\incloud\header\nav.pug and placed the plugin near the search button. In this example it is added below the search button. Indentation is very important here:
nav#nav
  span#blog-info
    a(href=url_for('/') title=config.title)
      if theme.nav.logo
        img.site-icon(src=url_for(theme.nav.logo))
      if theme.nav.display_title
        span.site-name=config.title
  #menus
  !=partial('includes/header/menu_item', {}, {cache: true})
  #nav-right
    if (theme.algolia_search.enable || theme.local_search.enable || theme.docsearch.enable)
      #search-button
        a.site-page.social-icon.search(href="javascript:void(0);")
          i.fas.fa-search.fa-fw
+      #he-plugin-simple
    #toggle-menu
      a.site-page(href="javascript:void(0);")
        i.fas.fa-bars.fa-fw
Run the usual Hexo clean / generate / server workflow, and the weather widget should appear in the navigation area.
The next thing worth exploring is how to give the cat proper prompt text or dialogue. The hide/show switch already works, but a small hint would make it much easier for visitors to discover.
I really like this cyber yet ancient style!